Is Tiling Hard?
Tiling a floor or wall might seem super straightforward at first. You choose some tiles, spread adhesive, lay them down, and grout the gaps.
Simple, right? Not necessarily – anyone who’s given it a go without proper training knows it can quickly become tricky. Uneven surfaces, wonky lines, or tiles that lift later can turn a pleasant weekend project into a right mess.
So, is tiling really that hard? The truth depends on your approach and knowledge. With proper preparation and a clear grasp of the process, it’s manageable to get a great result. Without it, small mistakes can and will spiral into big headaches.
Many homeowners jump in with enthusiasm, only to find themselves stumped by the mess they've created.
Let’s break down the basics of what tiling involves and how hard it really is:
First, you check the surface. Is it level, clean, and dry? Concrete floors might need a self-levelling compound if they’re uneven, while walls may require a backing board for stability. This step is crucial as skipping it risks tiles shifting or cracking over time. Those in the know always check for these issues because movement in the base is trouble waiting to happen.
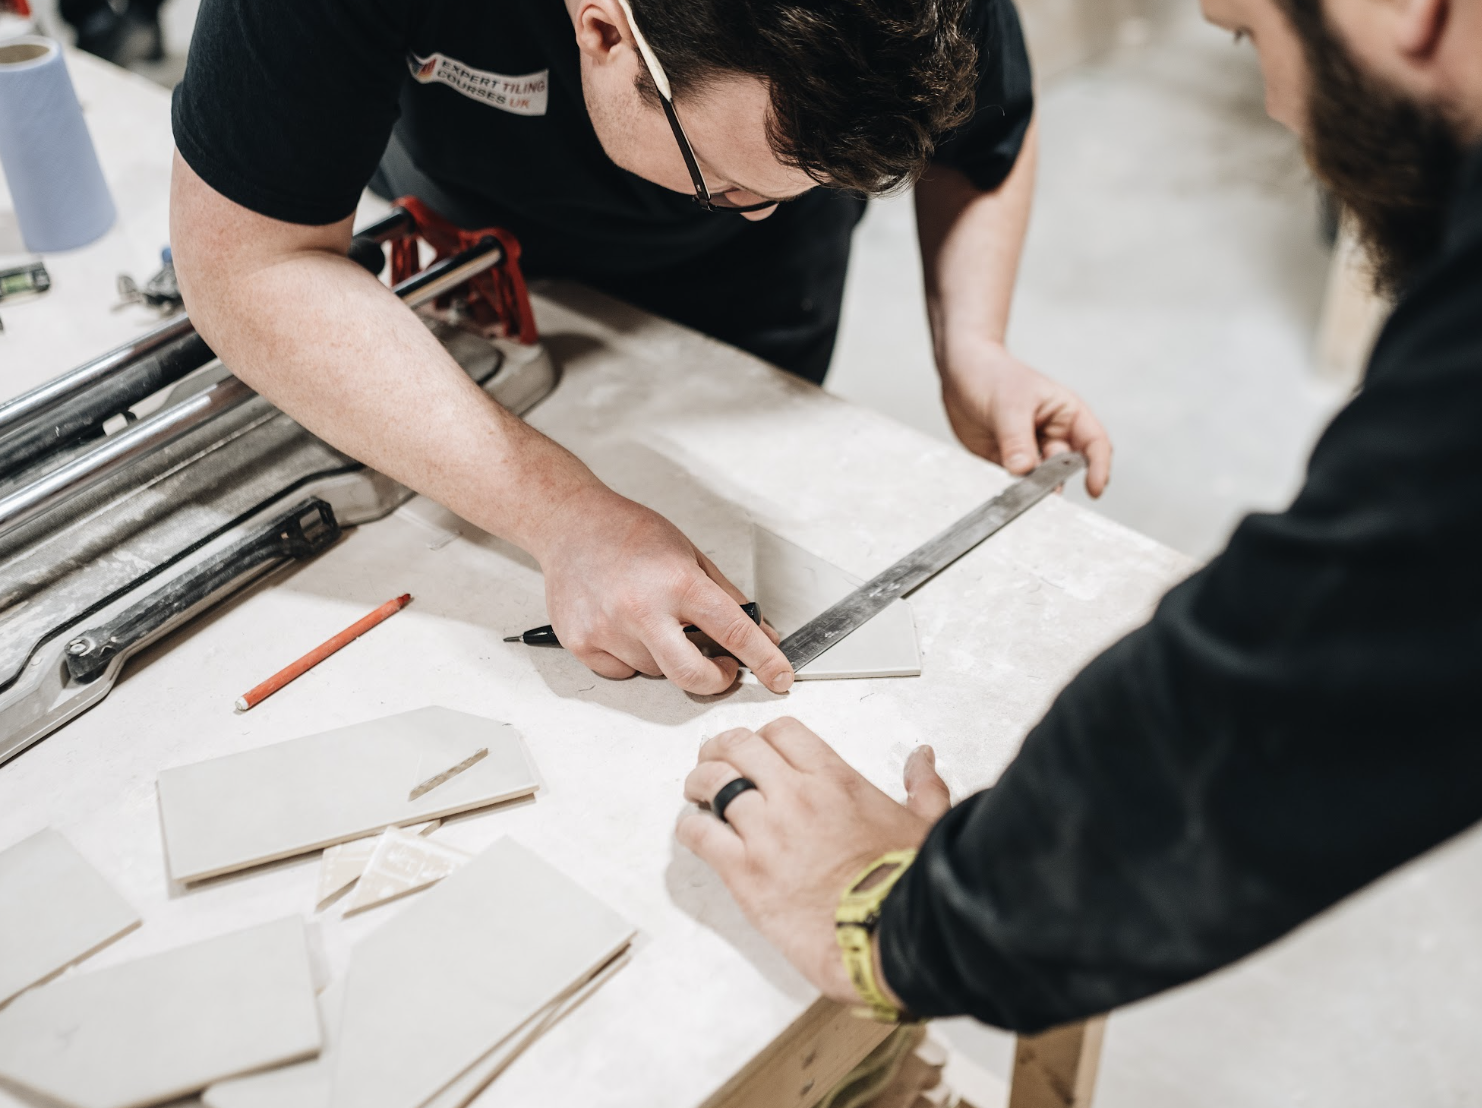
Next is measuring and planning pf the layout. You can’t just start sticking tiles down without a plan. Dry-lay them first to see how well they fit, especially around tricky areas like edges or corners. Plan for cuts – especially those tricky angled or curved ones around pipes or sockets. Tools like a tile cutter or angle grinder make this possible, but using them incorrectly leads to rougher edges and wasted tiles.
Choosing materials is also a key consideration. Ceramic tiles are easier for beginners, but porcelain is denser and tougher to cut. Natural stone like slate adds class but also introduces the issue of stains if not sealed properly. The best adhesives to use depend on what you're doing – choose cement-based adhesive for most jobs, ready-mixed for walls in dry areas. Grout comes sanded or unsanded, depending on joint size. Pick the wrong one, and you risk cracking or discolouration. Sealant is vital in wet areas to prevent mould. All these choices come from understanding how materials work together.
Laying tiles is where it all comes together. Spread adhesive with a notched trowel to create ridges for better grip. Press tiles in place, using spacers for even gaps. Work in small sections so the adhesive doesn’t dry out. Tap with a rubber mallet to set them flush. Sounds easy, but humidity, temperature, and even room airflow affect drying times. In chilly UK weather, adhesive sets slower, risking movement. Hot days speed it up, leaving no room for tweaks.
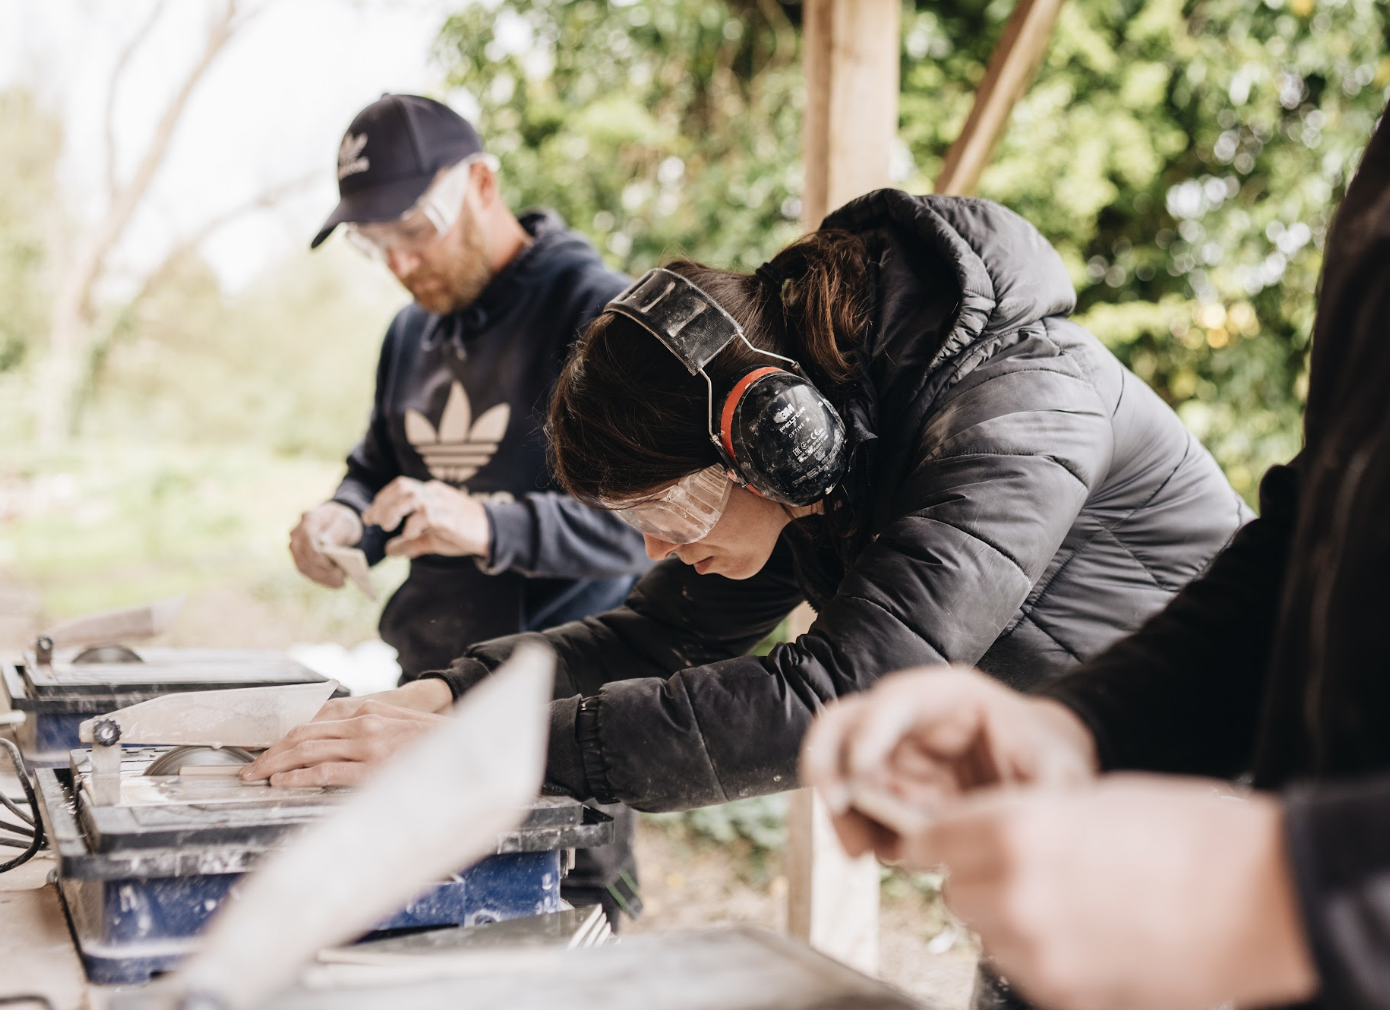
Cutting tiles is often where a lot of people stumble. Straight cuts are simple with a manual tile cutter, but curves need a diamond hole saw or angle grinder. Safety gear like gloves and goggles is a must – tile shards can fly. One wrong move, and you’ve ruined a tile or, worse, hurt yourself. Practise on offcuts first to get the hang of it.
Grouting comes after the adhesive sets, usually 24 hours later. Mix grout to a smooth consistency, then apply it with a rubber float, pushing it into joints. Wipe excess with a damp sponge before it sets hard. Haze – that cloudy residue – needs a haze remover if not cleaned promptly. Then seal the grout to protect against water and stains. Skip this, and your work won’t last in bathrooms or kitchens.
What makes tiling feel tough is the chain of potential pitfalls. Uneven spacing creates wobbly lines. Poor surface prep leads to lifting tiles. The wrong grout colour can ruin the look. These aren’t rare mistakes; they happen when steps are rushed. For example, not including expansion joints in large areas can cause cracking as floors expand and contract with temperature changes. UK building regs often require them every 8-10 metres.
A laser level ensures dead-straight lines over long distances. Knee pads save your joints during hours on the floor. A mixing paddle in a drill makes grout prep a breeze. Quality tools cut frustration, but knowing how to use them properly is what matters. Cheap ones often pack up mid-job, causing delays.
A small bathroom might take a weekend, but a full kitchen floor could stretch to a week if you’re on your own. Factor in drying times – adhesive, grout, sealant. Rushing leads to mistakes like stepping on unset tiles, which shifts them.
Cost-wise, doing it yourself saves compared to hiring a pro, but mistakes can rack up expenses. Wasted tiles, extra materials, or calling in a professional to fix things add up. Materials typically cost £20-60 per square metre, depending on tile type. Hiring a pro adds £40-70 per square metre. Getting it right the first time keeps costs down.
Despite the challenges, tiling is rewarding. A well-tiled space boosts your home’s value and feels satisfying. It’s durable – good work lasts decades with minimal upkeep. Sweep, mop, and reseal grout yearly, and it stays fresh. Tiles outlast carpet or vinyl in high-traffic areas.
To avoid feeling overwhelmed, start small. Try a utility room or cloakroom floor to build confidence. Watch for issues like lippage – when tile edges aren’t level – by using levelling clips. These plastic wedges keep tiles flat while setting.
Patience is everything. Measure twice, cut once, as they say. Clean as you go to avoid hardened messes. Work in good light to spot problems early.
Learning from reliable sources can make all the difference. A structured approach helps you anticipate issues, like testing subfloors for damp or calculating tile quantities to avoid running short.
Environmental factors matter too. In the UK’s damp climate, mould under tiles is a risk without proper waterproofing. Outdoor tiles need to be frost-resistant. Building regs set rules, like tanking systems for showers.
Tiling trends change, but basics hold. Metro tiles are timeless for splashbacks, while large-format tiles mean fewer grout lines for a sleek look. Patterns like herringbone add style but need precise cuts.
For awkward spaces, flexibility helps. Bullnose tiles give neat edges, or metal trims for a modern touch.
Maintenance is straightforward. Avoid harsh cleaners that etch surfaces. Fix loose tiles quickly to stop water damage.
Is tiling for everyone? Not if you’re short on time or have mobility issues. Arthritis or back problems make kneeling tough. In those cases, pros are the way to go.
But for those ready to learn, tiling is a skill that keeps giving. Revamp a patio, refresh a fireplace surround – the principles carry over.
Ultimately, tiling’s difficulty comes down to preparation and knowledge. Dive in unprepared, and it’s frustrating. Approach it with care, and it transforms spaces beautifully. The trick is building that know-how to avoid pitfalls, turning a daunting task into a rewarding project.
Our tiling courses cover all of the above to industry leading standards and give you all the knowledge you need to carry out tiling jobs and even start a career in the industry for yourself.
Browse Tiling Courses Sheffield
Find the perfect course for you
Whether you're just getting started, or have a few years in the construction industry under your belt and are looking to up-skill yourself, we have a course for everyone.